How to turn Gmail praise into website, email, and social proof
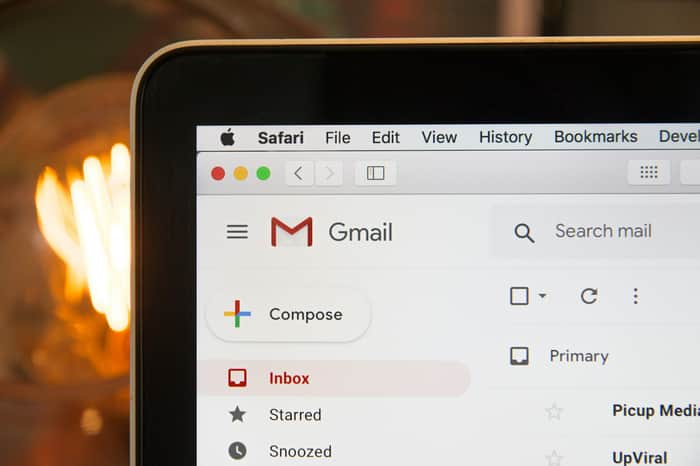
Build a small system that collects testimonials as they come in and reviews them every month. That way, when it’s time to share social proof, it’s already there.
Here's how to build that system.
What you'll build
This system does five simple things:
- Processes customer messages you label
- Pulls out the result
- Checks if you have permission to use the quote
- Creates a follow-up question if the quote needs more detail
- Saves approved quotes in the right place
Then, once a month, you'll choose your best quotes and use them on your website, emails, and social media.
We'll keep things simple. Start with Gmail and a Jotform form. Don't try to connect every tool yet. Get one simple system working first.
Tools
- Gmail to catch good customer praise
- Jotform to collect direct testimonials and permission
- Zapier to send each message where it needs to go
- AI (via Zapier) to pull out the quote, result, product, and next step
- Airtable to keep all your testimonials in one place
Step 1 — Decide what makes a good testimonial
Before you save your first testimonial, decide what good proof looks like; otherwise, you'll end up saving messages that aren't very helpful.
Look for testimonials with at least one of these:
- A clear result
- A before-and-after
- A number
- A customer type
- A use case
Use this scoring guide (or something similar):
- 5 = Very strong proof
- 4 = Good details
- 3 = Positive, but a little vague
- 2 = Nice feedback only
- 1 = Not useful
You now have a simple way to sort the good testimonials from the weak ones.
Step 2 — Create your proof library
Now, it's time to create one place to store all your customer proof.
In Airtable:
- Cllick + Create → choose your workspace → Build an app on your own
- Name your base: Proof Library
- Rename the first table to: Testimonials
Create these fields:
- Customer Name
- Source
- Original Message
- Clean Quote
- Outcome
- Product Used
- Permission Status
- Strength Score
- Best Use Case
- Next Action
- Date Added
Set Original Message, Clean Quote, and Outcome as long text fields. Set Permission Status as single select with: Not requested, Asked, Approved, and Rejected. And set Best Use Case as single select with: Homepage, Pricing page, Sales email, Launch email, Social post, and Case study. Set Date Added as a Created time field.
Every testimonial now has one place to live, along with its permission status and best use case.
Step 3 — Start with the inbox
Your inbox is probably full of customer feedback. Start there.
- Open Gmail.
- Left sidebar → More → Create new label.
- Name the label: Proof - Review.
Next, search your inbox for old messages with phrases like:
- “Saved me”
- “Helped me”
- “Finally”
- “Because of your”
- “Got my first”
- “Closed”
- “Launched”
- “This worked”
- “Worked perfectly”
- “Thank you so much”
When you find a message that's worth saving, open the message, click the Label icon, and add the Proof - Review label.
Spend the first week or two labeling messages yourself. This helps you develop a good sense of good testimonials before you automate anything.
Step 4 — Create the Gmail-to-AI workflow
It's time to automate the process.
Go to Zapier and create a new Zap. Trigger:
- App: Gmail
- Event: New Labeled Conversation
- Search: label:proof-review in: inbox
- Click: Test trigger
You should find one of the emails you labeled earlier. If not, label one email in Gmail and test again.
Now, add the AI step:
- Click: '+'
- Choose: AI by Zapier → Analyze and Return Data.
Paste this prompt (or something similar):
Read the customer message below. Use only the information in the message. Don't make up results or add details that the customer never shared.

Return:

Clean Quote
*   Under 35 words.
*   Stay as close to the customer's original wording as possible


Outcome
*   What changed for the customer
*   If no outcome is mentioned, write "Outcome not stated."


Product Used
*   The product, service, template, course, or feature they mention


Strength Score
*   Rate the testimonial from 1 to 5


Permission Status:
*   If the customer permits to share their testimonial, write "Permission clear."
*   If they don't, then write "Permission not clear."


Best Use Case
*   Homepage
*   Pricing page
*   Sales email
*   Launch email
*   Social post
*   Case study


Follow-Up Question
*   If the testimonial is vague or needs more detail, write one short question that would make it stronger


Score the testimonial like this:
*   5 = Specific and convincing
*   4 = Strong with useful details
*   3 = Positive but general
*   2 = Kind words only
*   1 = Not usable

Customer message: Insert the Gmail email body here.
Click: Test step.
The AI will read each email and extract the important details, so every testimonial is organized consistently. If you notice the AI rewriting the customer's words too much, add: “Keep the customer’s plain language.”
Step 5 — Send each testimonial to the right place
Now, it's time to decide what happens to each testimonial.
In Zapier, use Paths if your plan includes them. If not, create separate Zaps with Filters.
Path 1 — Strong and approved
If:
- Strength Score = 4 or 5
- Permission Status = Permission clear
Do this:
Create a new Airtable record and save the testimonial.
Map:
- Customer Name = Gmail sender name
- Email = Gmail sender email
- Original Message = Gmail body
- Clean Quote = AI Clean Quote
- Outcome = AI Outcome
- Product Used = AI Product Used
- Permission Status = Needs review
- Permission Evidence = AI Permission Evidence
- Strength Score = AI Strength Score
- Best Use Case = AI Best Use Case
- Follow-Up Question = AI Follow-Up Question
- Next Action = Check the original message and approve
- Source = Gmail
- Gmail Message ID = Gmail message or conversation ID
Do not mark the quote as Approved until a person checks the original message and the permission.
Path 2 — Strong, but no permission
If:
- Strength Score = 4 or 5
- Permission Status = Permission not clear
Do this:
Add a Gmail action, then create a draft asking if you can use the testimonial.
Then, add Airtable → Create Record.
- Set Permission Status to Asked
- Set Next Action to Wait for permission
Only change the status to Asked after the draft has been sent.
Path 3 — Nice, but vague
If:
- Strength Score = 1, 2, or 3
Do this:
Add a Gmail action, then create a draft asking what changed after using your product.
Then, create an Airtable record.
- Set Permission Status to No permission.
- Set Next Action to Ask for details.
Path 4 — Weak or not useful
If:
- Strength Score is 1 or 2
Do this:
Create an Airtable record.
- Set Permission Status to Not requested
- Set Next Action to Manual review or do not use
Now, each testimonial has a clear place and a clear next step.
Step 6 — Collect full testimonials with Jotform
The best time to send a testimonial form is right after a customer says something good. Don't send your testimonial form cold.
Go to Jotform:
- Templates → search Testimonial Request Form → Use Template
Create the form with these fields:
- Name
- Product used
- Problem before
- Result after
- Specific result
- Permission to use the testimonial
- Permission to use their name
- Permission to use their company name
Make the permission questions clear. Give customers enough information to make an informed choice. Tell them where their testimonial may be published and whether you'll edit it.
Now, connect Jotform to Airtable with Zapier:
Create a Zap:
- Trigger: Jotform → New Submission
- Action: Airtable → Create Record
Map each answer to the matching field in your Airtable base.
If the customer clearly agrees to your use of their testimonial, set Permission Status to Needs review. After a person checks the form answers, change the status to Approved. If they select No, set it to No permission.
Form testimonials and inbox testimonials now land in one library.
Step 7 — Turn your library into marketing
A library of testimonials only helps if you use it.
Create one final Zap:
- Trigger: Schedule by Zapier → Every Month
- Action: Gmail → Send Email
Send the reminder to yourself. Have the email remind you to:
- Open your Airtable Proof Library.
- Review testimonials marked Needs review.
- Review approved testimonials.
- Pick your best quotes.
- Add them to your homepage, emails, social posts, pricing page, or sales page.
- Check the original message before publishing.
- Check exactly what the customer allowed you to share.
That's it. One reminder each month is enough to keep your testimonial library useful.
A few things to remember
As you build your testimonial system, always keep these points in mind.
- Ask for permission. A private email isn't the same as a public testimonial. Ask before you share it.
- Don't over-edit. Clean up the quote if needed, but keep as much of the customer's original words and meaning as possible.
- Keep it simple. Start with just Gmail and Jotform. Add more sources only after this system is working well.
The best systems are usually the simplest. One label, one form, one library, and one monthly review are all you need. That's enough to build a steady flow of customer testimonials without adding more work to your plate.

The permission-tracking piece is the part that breaks most DIY versions of this — it's easy for a private "thanks, this saved me!" email to end up as a public homepage quote without anyone explicitly agreeing to that.
I built Testimonial Collector for exactly that gap: a customer submits through a link, it sits in a moderation queue, and only what you explicitly approve or reject can go public. Nothing reaches the site without that step.
The scoring system you laid out (specific result > vague praise) is a good addition on top of that — right now approval is binary (approve/reject), no strength score. That's a useful idea.
the permission evidence field is a small detail that will save this system later. i would also add a follow-up owner and due date, so a strong quote marked "asked" does not disappear in Airtable forever. keep the original email and the exact permission reply next to the cleaned quote, then review the queue weekly. that keeps the automation useful without letting it quietly turn a private message into public proof.
It's a very useful method of thinking about customer feedback. ~
It is not just accumulating pleasant words people said that’s useful. This can transform those reviews into tangible evidence that appears where future customers make their decisions.
I am also open to leaving original wording as is before we reword everything into proper marketing wording. The client's language is often much more powerful.
One simple habit I find useful is to tag feedback by what it proves: a problem, an outcome, a feature, or the reason someone chose you. It will be easier to reuse them later without losing the meaning behind it.
The part I like most is separating positive feedback from useful proof. A customer saying “this is great” is nice, but knowing what changed for them is what makes the testimonial valuable.
I also think the permission step is easy to overlook when people automate this kind of workflow. Having the system surface potential testimonials while keeping the final approval manual seems like a good balance.
This is a smart system. The piece I'd add is a source tag for context, a testimonial from a free user reads very differently than one from a two-year paying customer, and mixing them without a flag burns trust the first time a prospect checks. I run something similar for Cloud Veterans success stories, and the quotes that actually convert are never the most polished, they're the ones with a specific number and a specific job title attached, worth making that a required field before a quote gets marked approved.
I wouldn't compromise on keeping the original message beside the cleaned quote. I'd store the Gmail message ID too, with the cleaned quote in a separate field that never overwrites the source. That turns the monthly review into a quick comparison instead of a search through old threads. It also keeps permission tied to the exact wording the customer approved, which matters when the quote appears on a homepage, in email, and in social posts.
Very helpful and informative article.
an untapped treasure trove of validation. thanks again!