Master File Uploads with EchoAPI: A Step-by-Step Guide
If you’ve ever struggled with file uploads, you know they can feel like a mini-boss fight in the API world. Luckily, after spending plenty of time working with EchoAPI’s upload feature, I’ve compiled the most common questions and pitfalls into a straightforward, no-stress guide. Let’s jump in.

File Upload Basics
Before you start, here’s what you need to know:
1. Should I use multipart/form-data?
Absolutely. This is the standard for HTTP file uploads, and EchoAPI fully supports it. It splits form data and files into separate parts, each with its own headers—perfect for sending binary files.
2. Which parameter key should I use for the file?
It depends on the API. The default is often file, but some APIs use image, document, avatar, upload, or video. Always check the API documentation. If you’re creating your own API, you can define the key in EchoAPI.
3. Do I need to include extra metadata?
Sometimes. Adding fields like file_name or media_type helps the backend process your upload. For instance, when uploading a profile picture, you might also include:
user_id: 12345type: avatar
👉 Pro tip: Always follow the API spec you’re working with.
Testing File Uploads in EchoAPI
1. Create or Edit an Endpoint
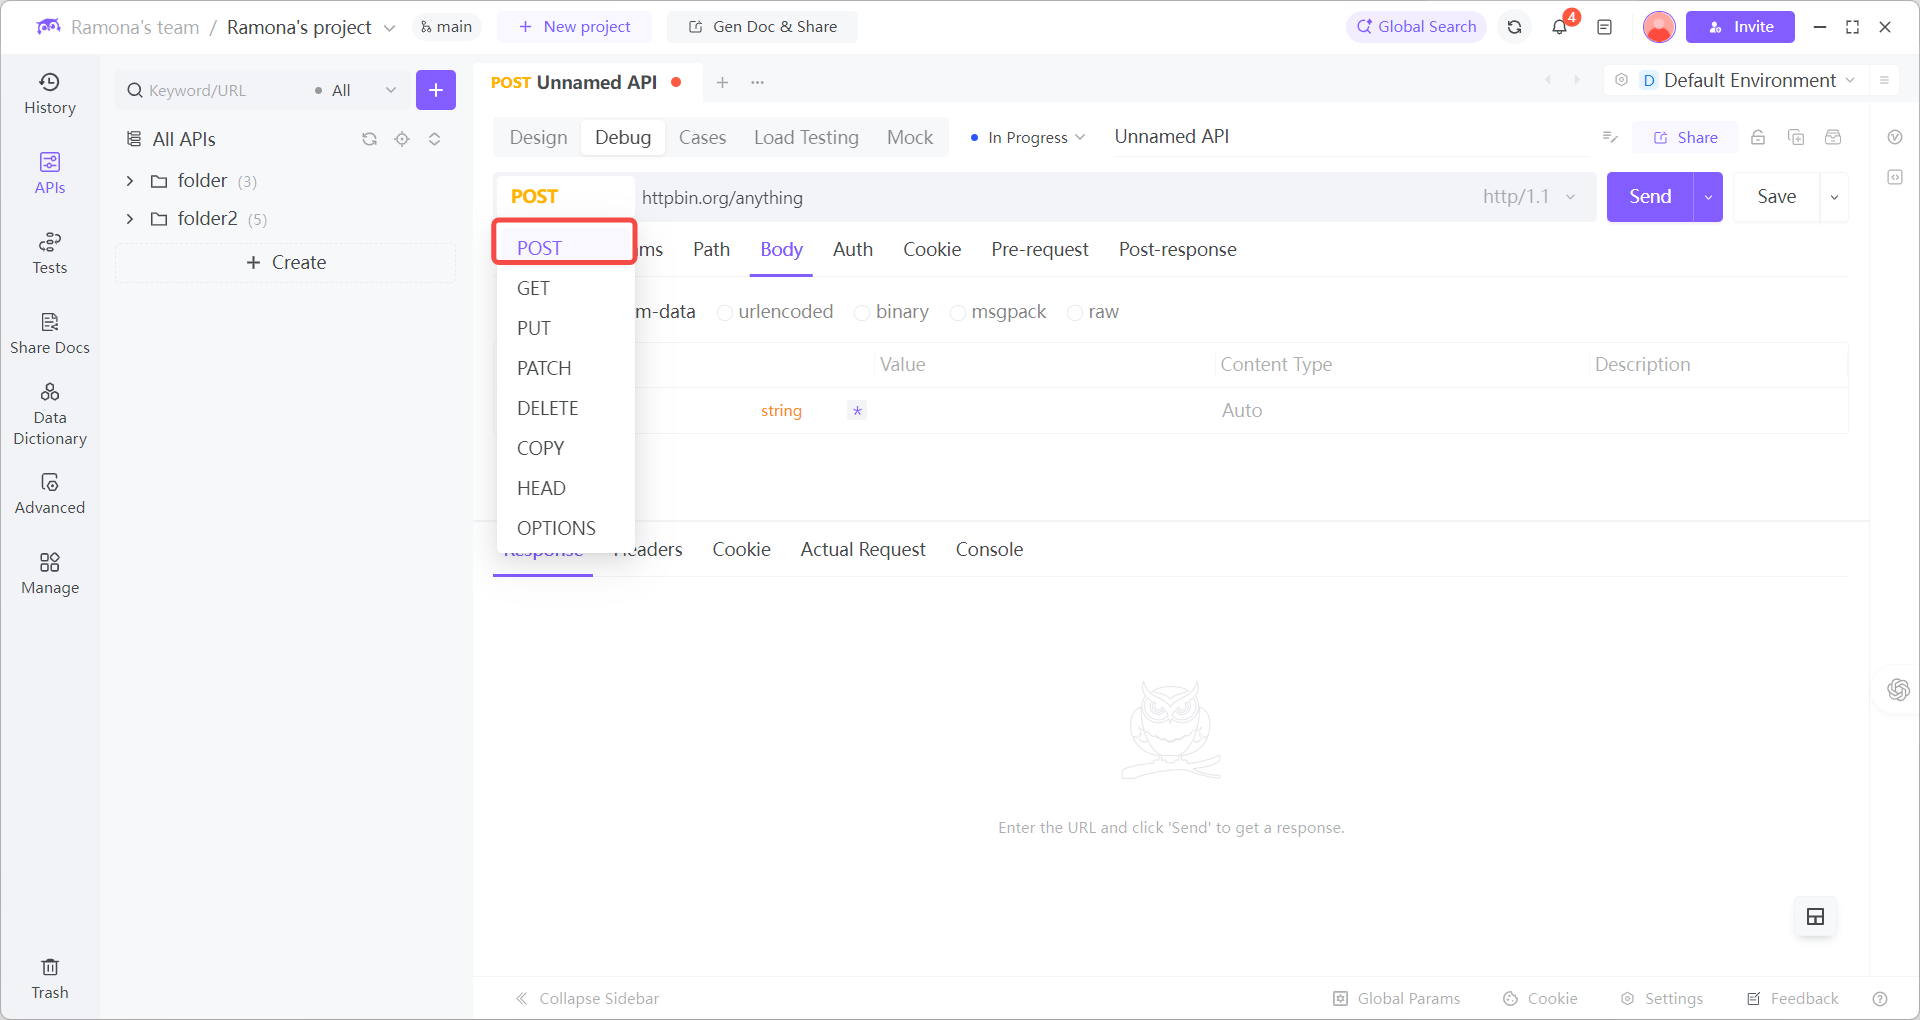
- Set the method to
POST(or whatever your API requires)
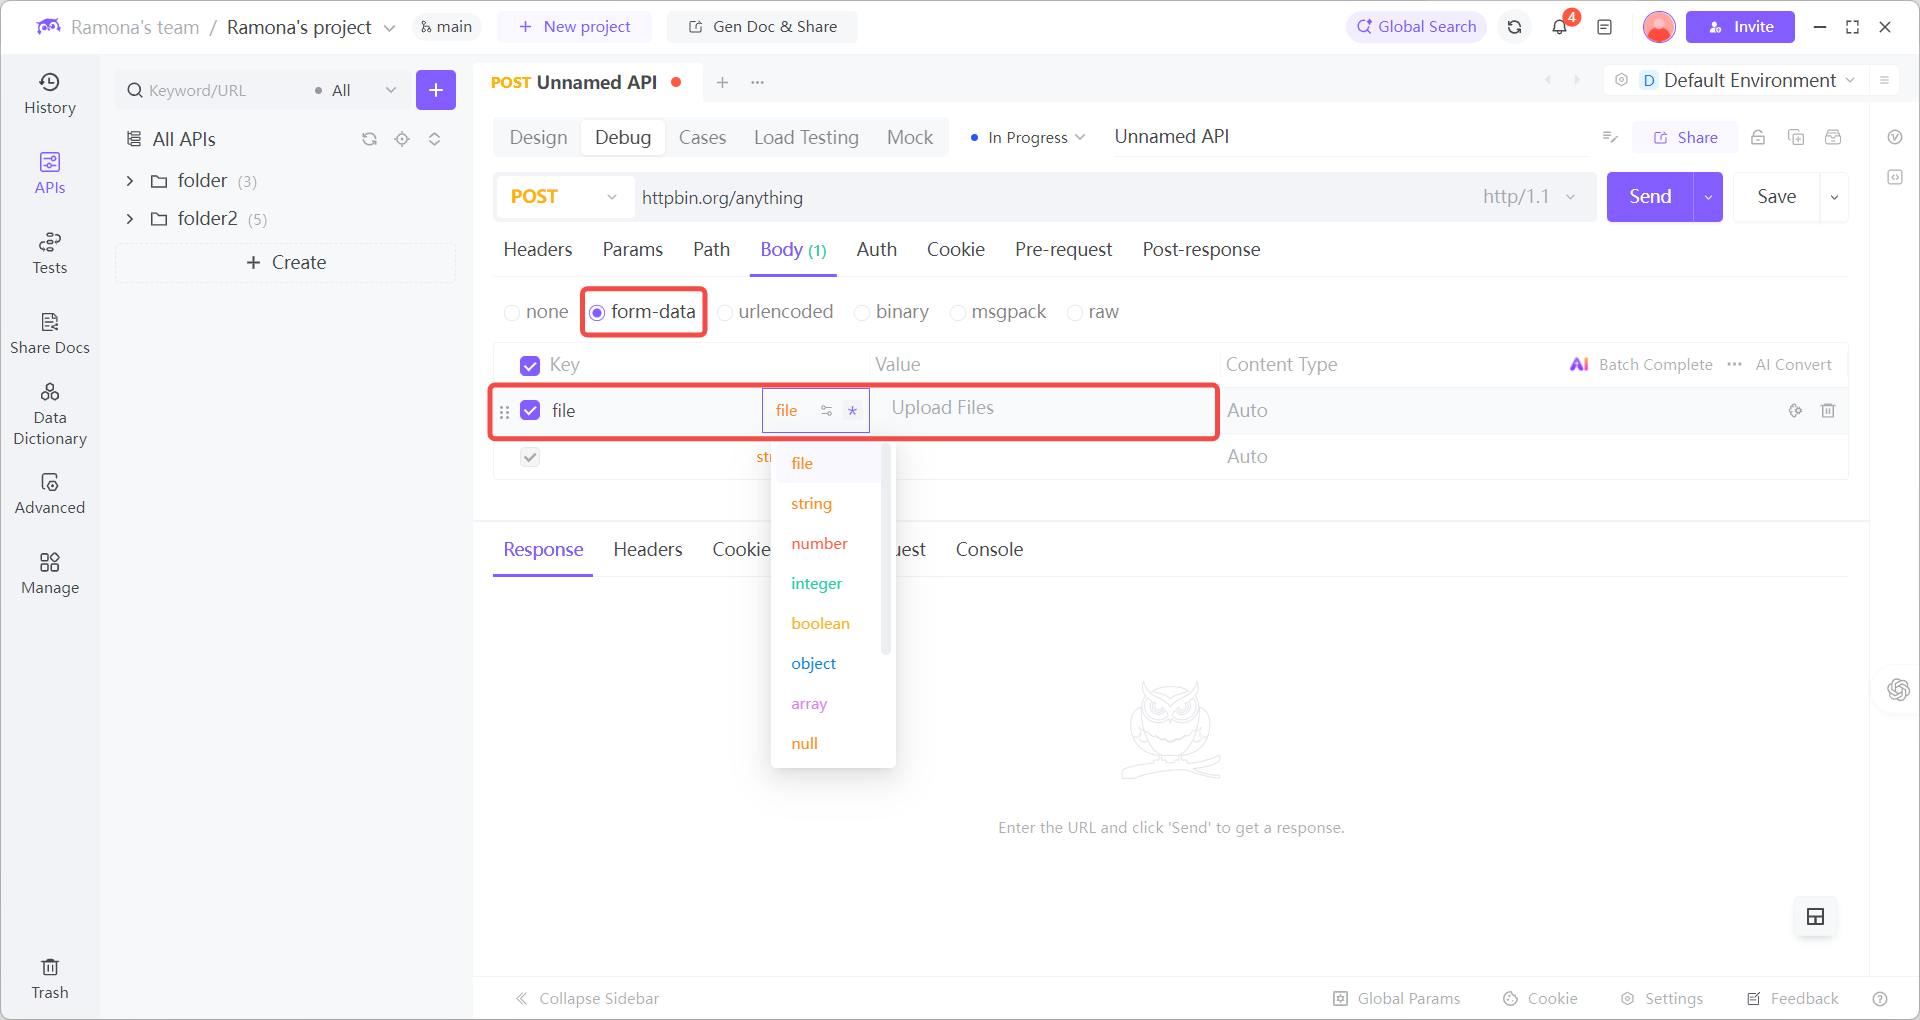
- In Parameters, click Add Parameter, choose File, and enter the field name (e.g.,
file)
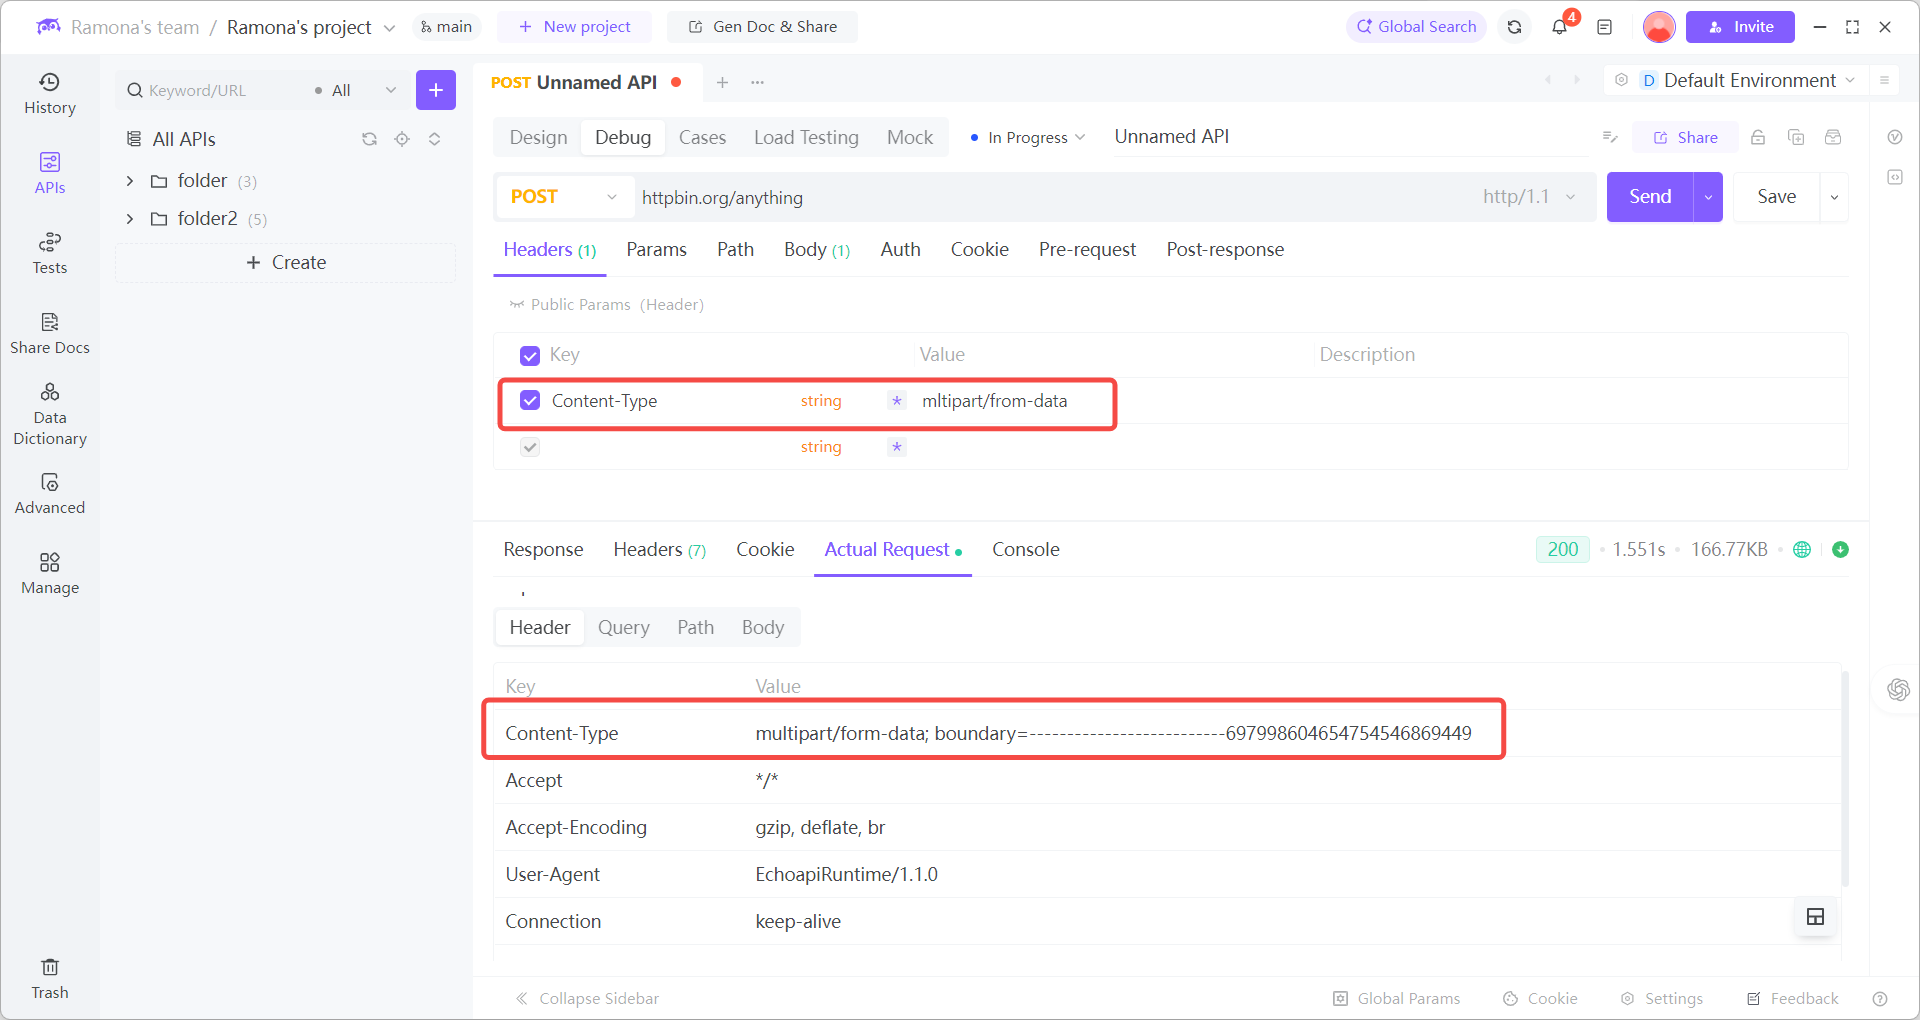
- Set Content-Type to
multipart/form-data
Important: Don’t manually add this header. EchoAPI (like Postman) automatically generates it with the correctboundary. Adding it yourself may cause conflicts. Only include other headers such asAuthorization: Bearer <token>.
- Add any required metadata fields like
file_nameormedia_type.
2. Upload Your Test File
- Click Upload Files in the parameter row
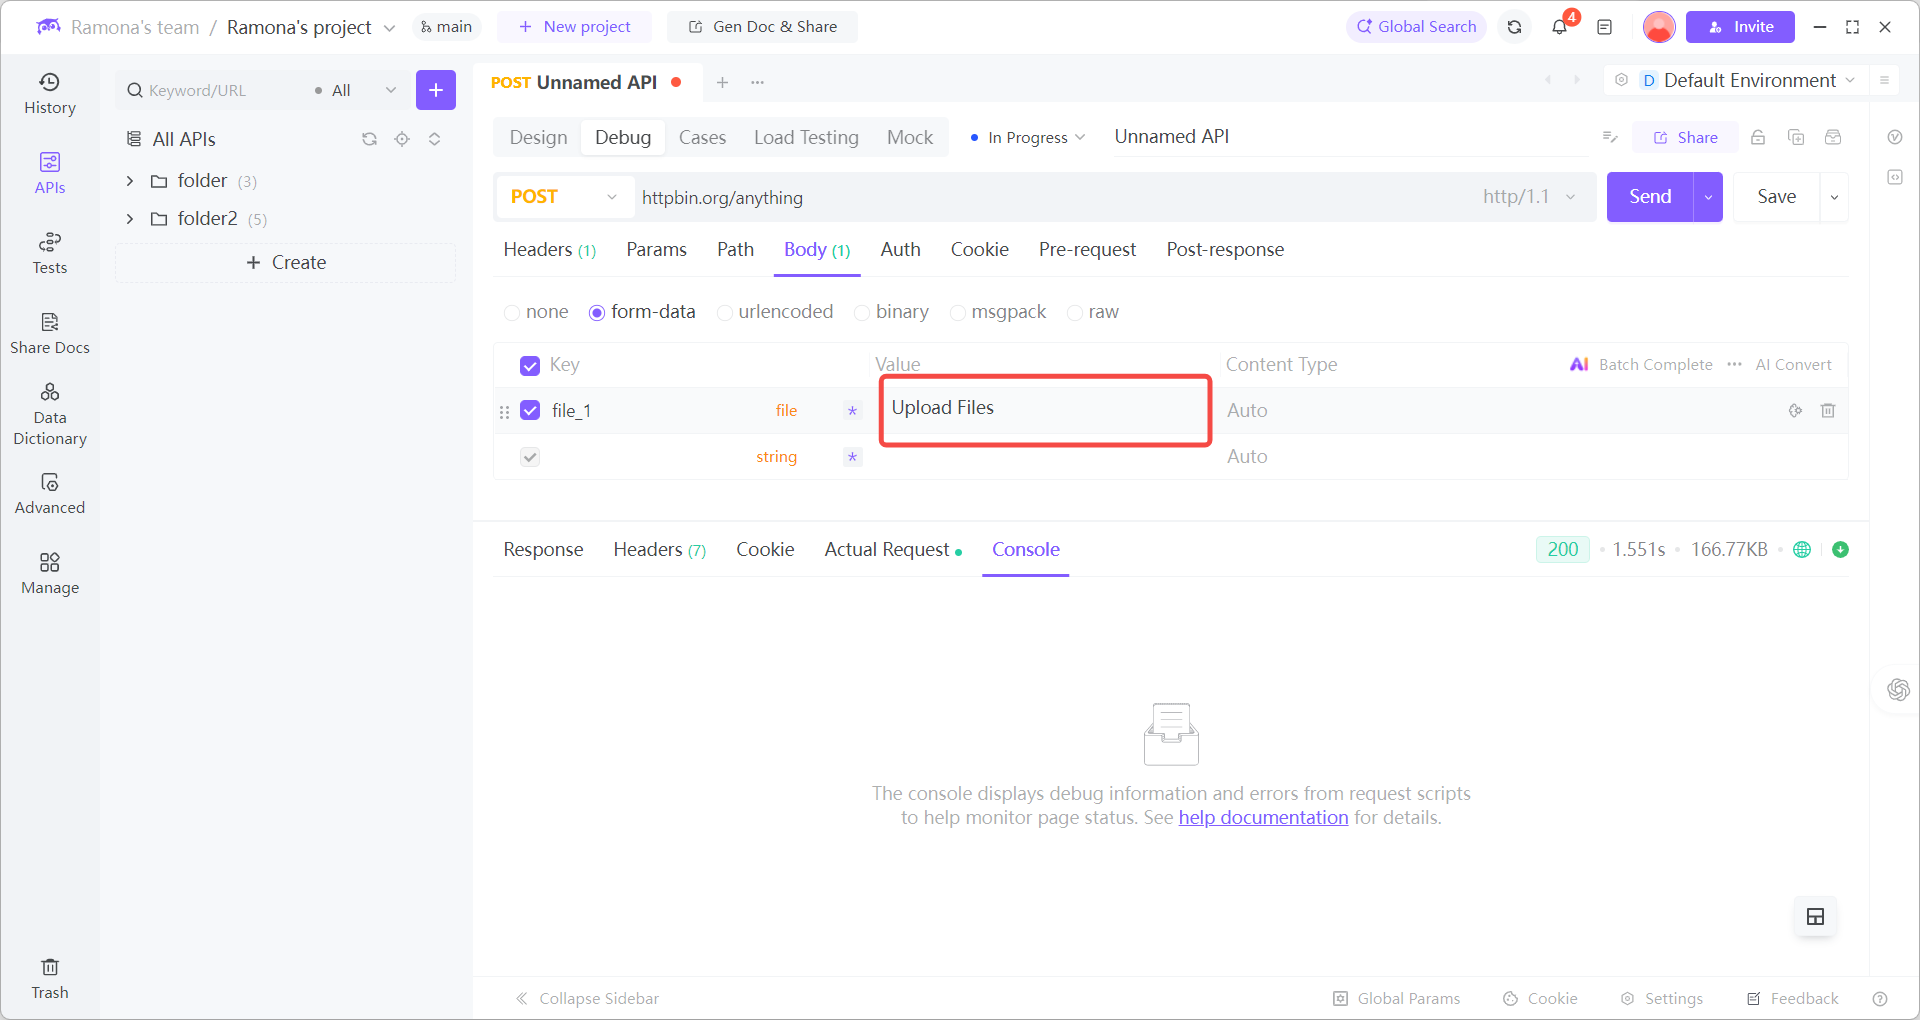
- Select your image, video, or PDF from your computer
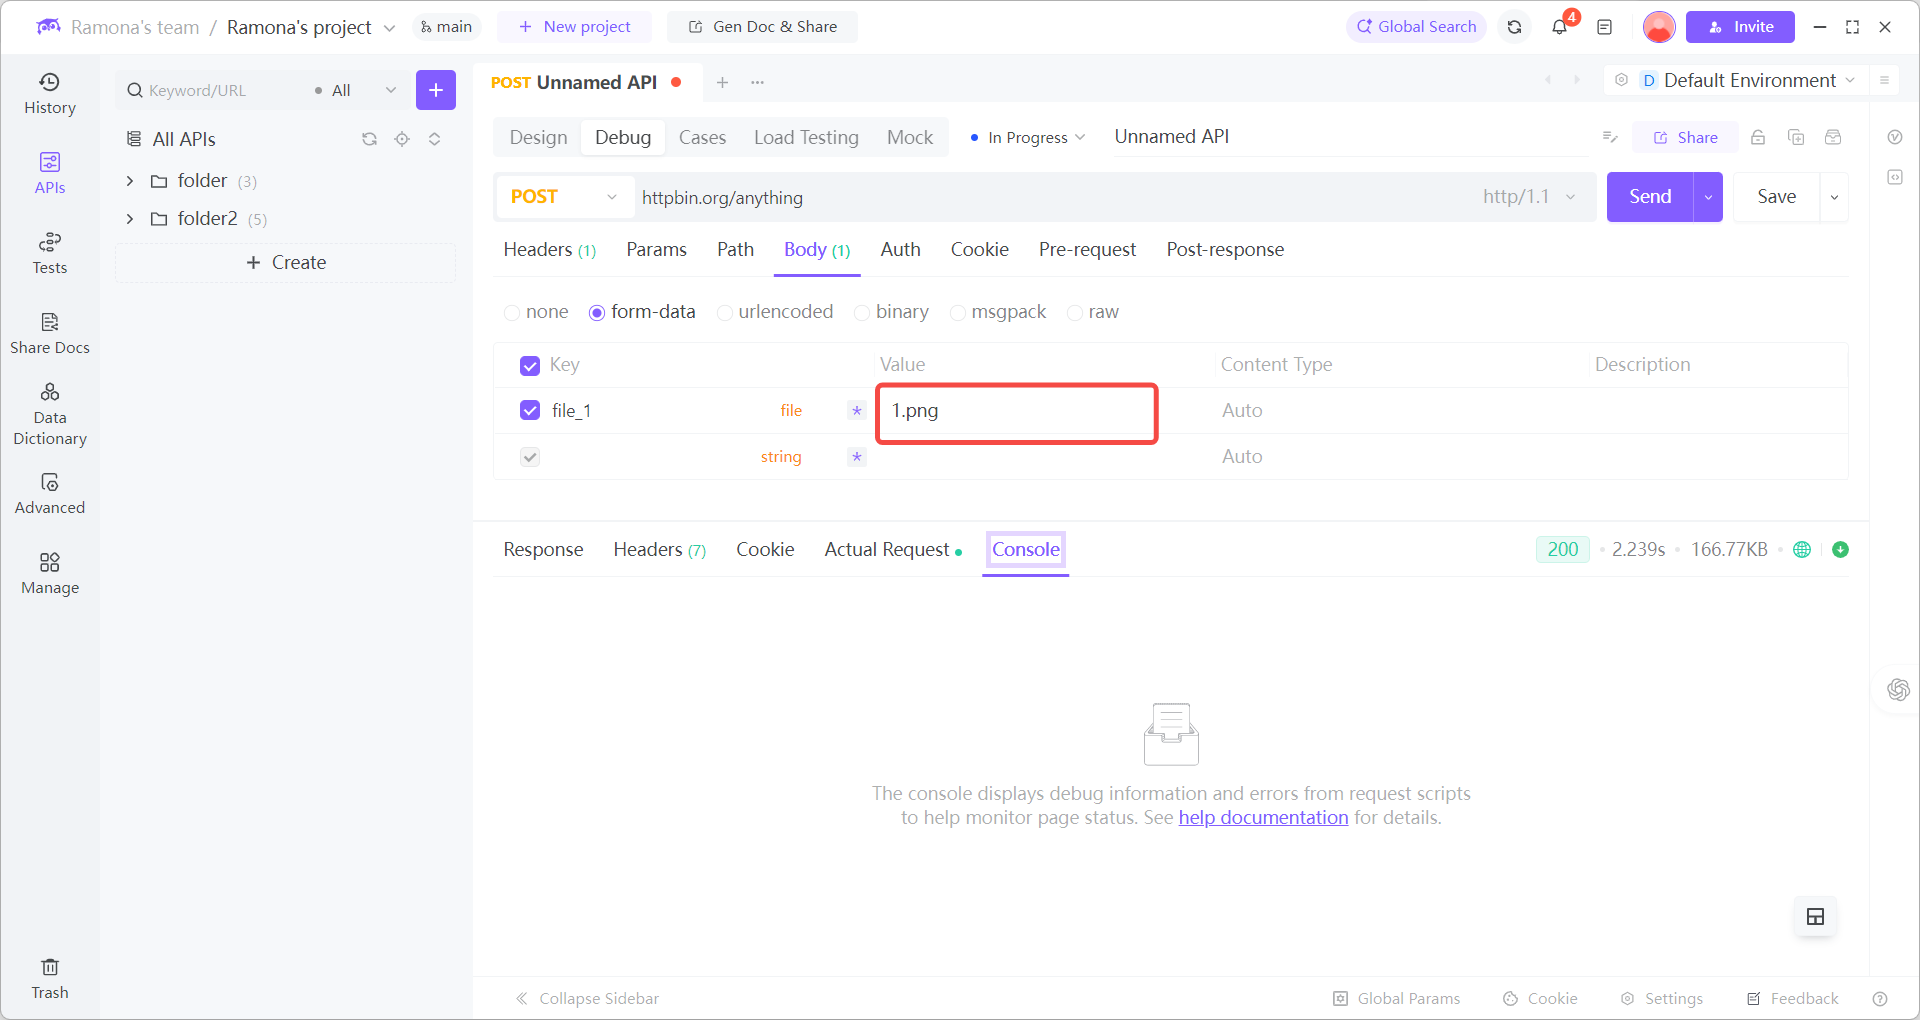
- Fill in additional fields as needed
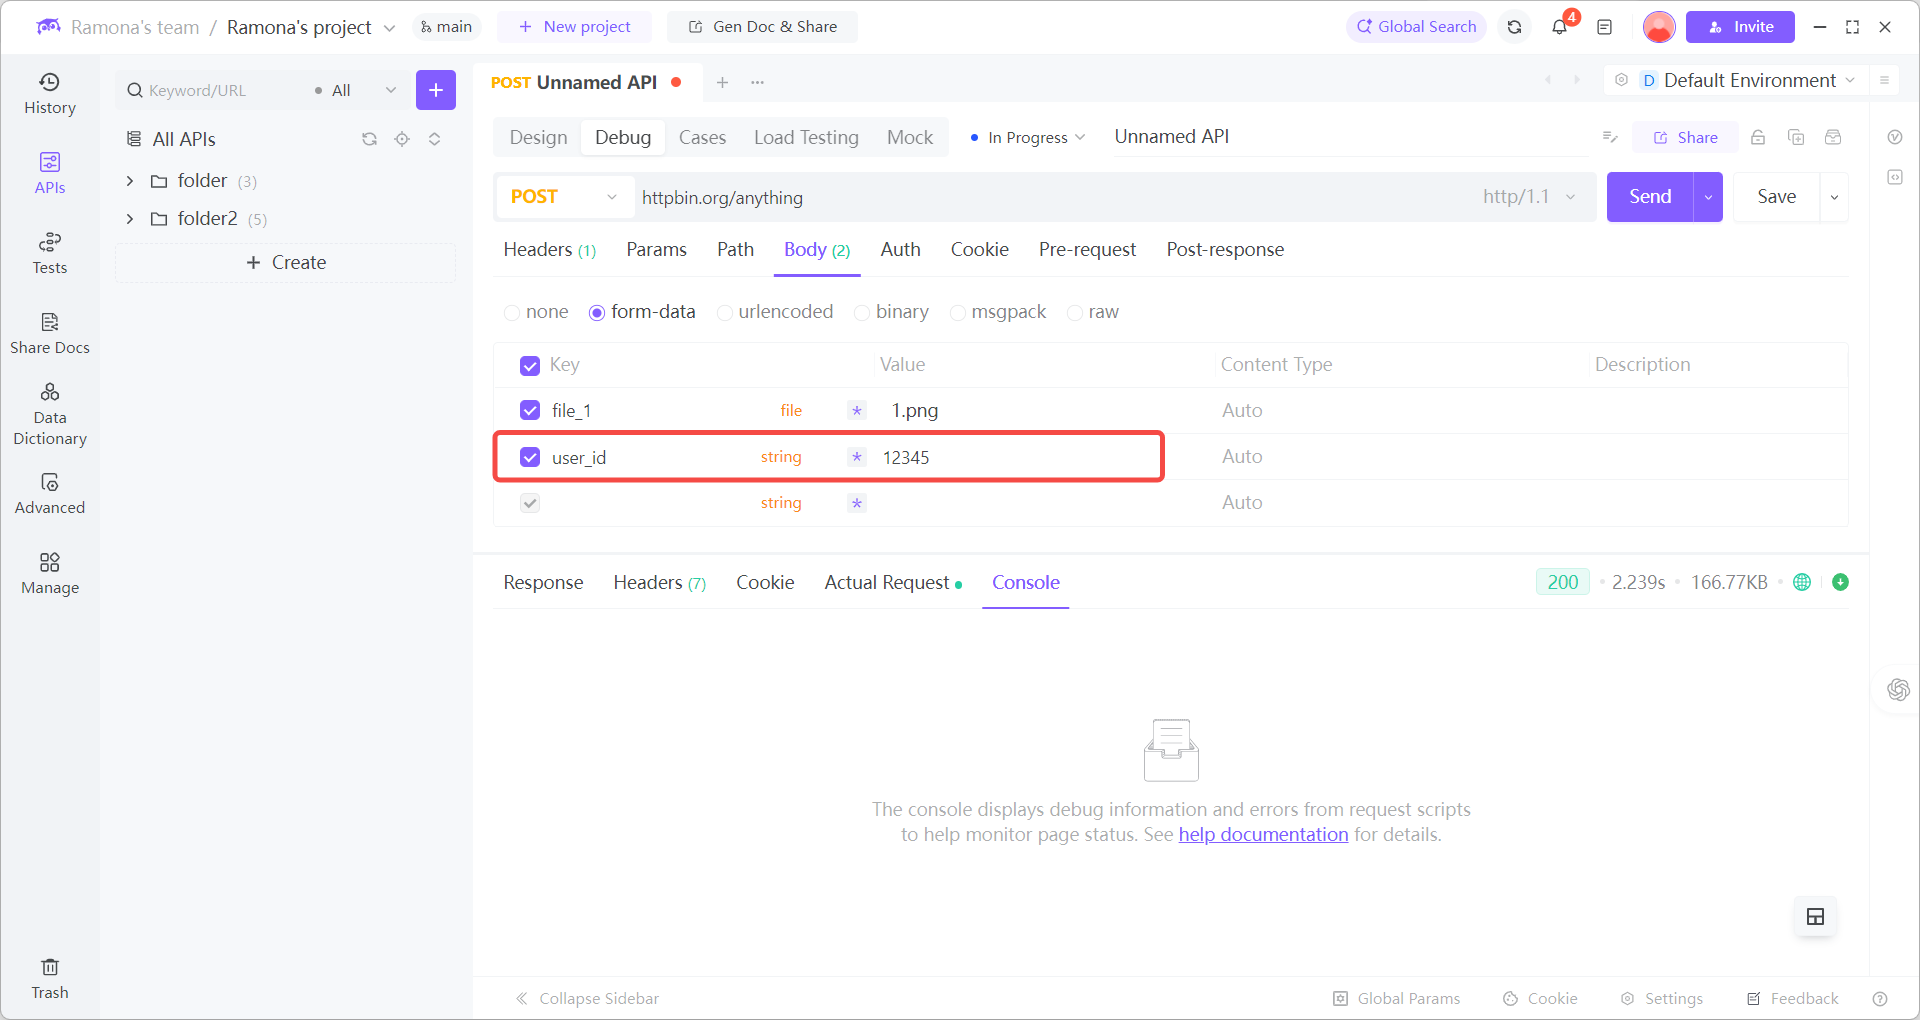
3. Send & Inspect
- Click Send
- Review the server response in the results panel
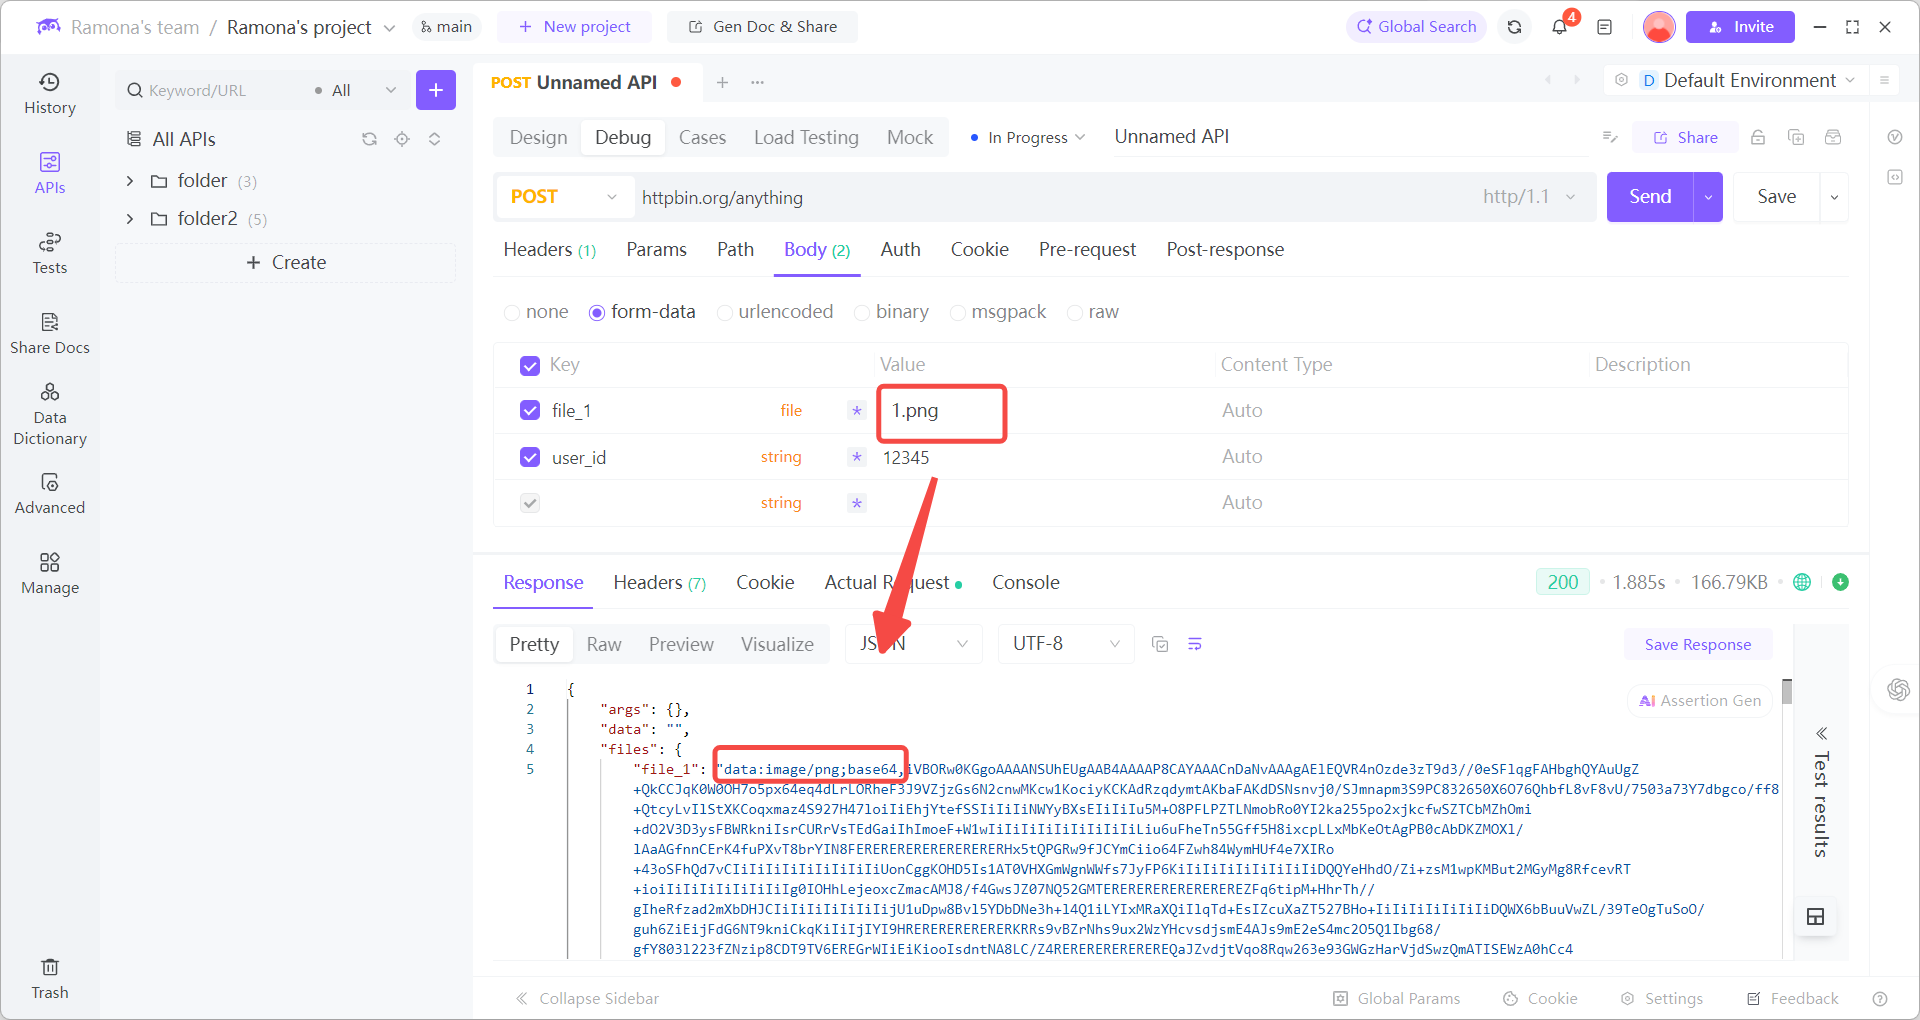
Example setup:
| Key | Value | Type |
| --------- | -------------- | ---- |
| file | my_photo.jpg | File |
| user_id | 12345 | Text |
Exporting API Requests to cURL
Want a quick way to generate a cURL command for your API? EchoAPI makes it easy:
- Click Generate Code
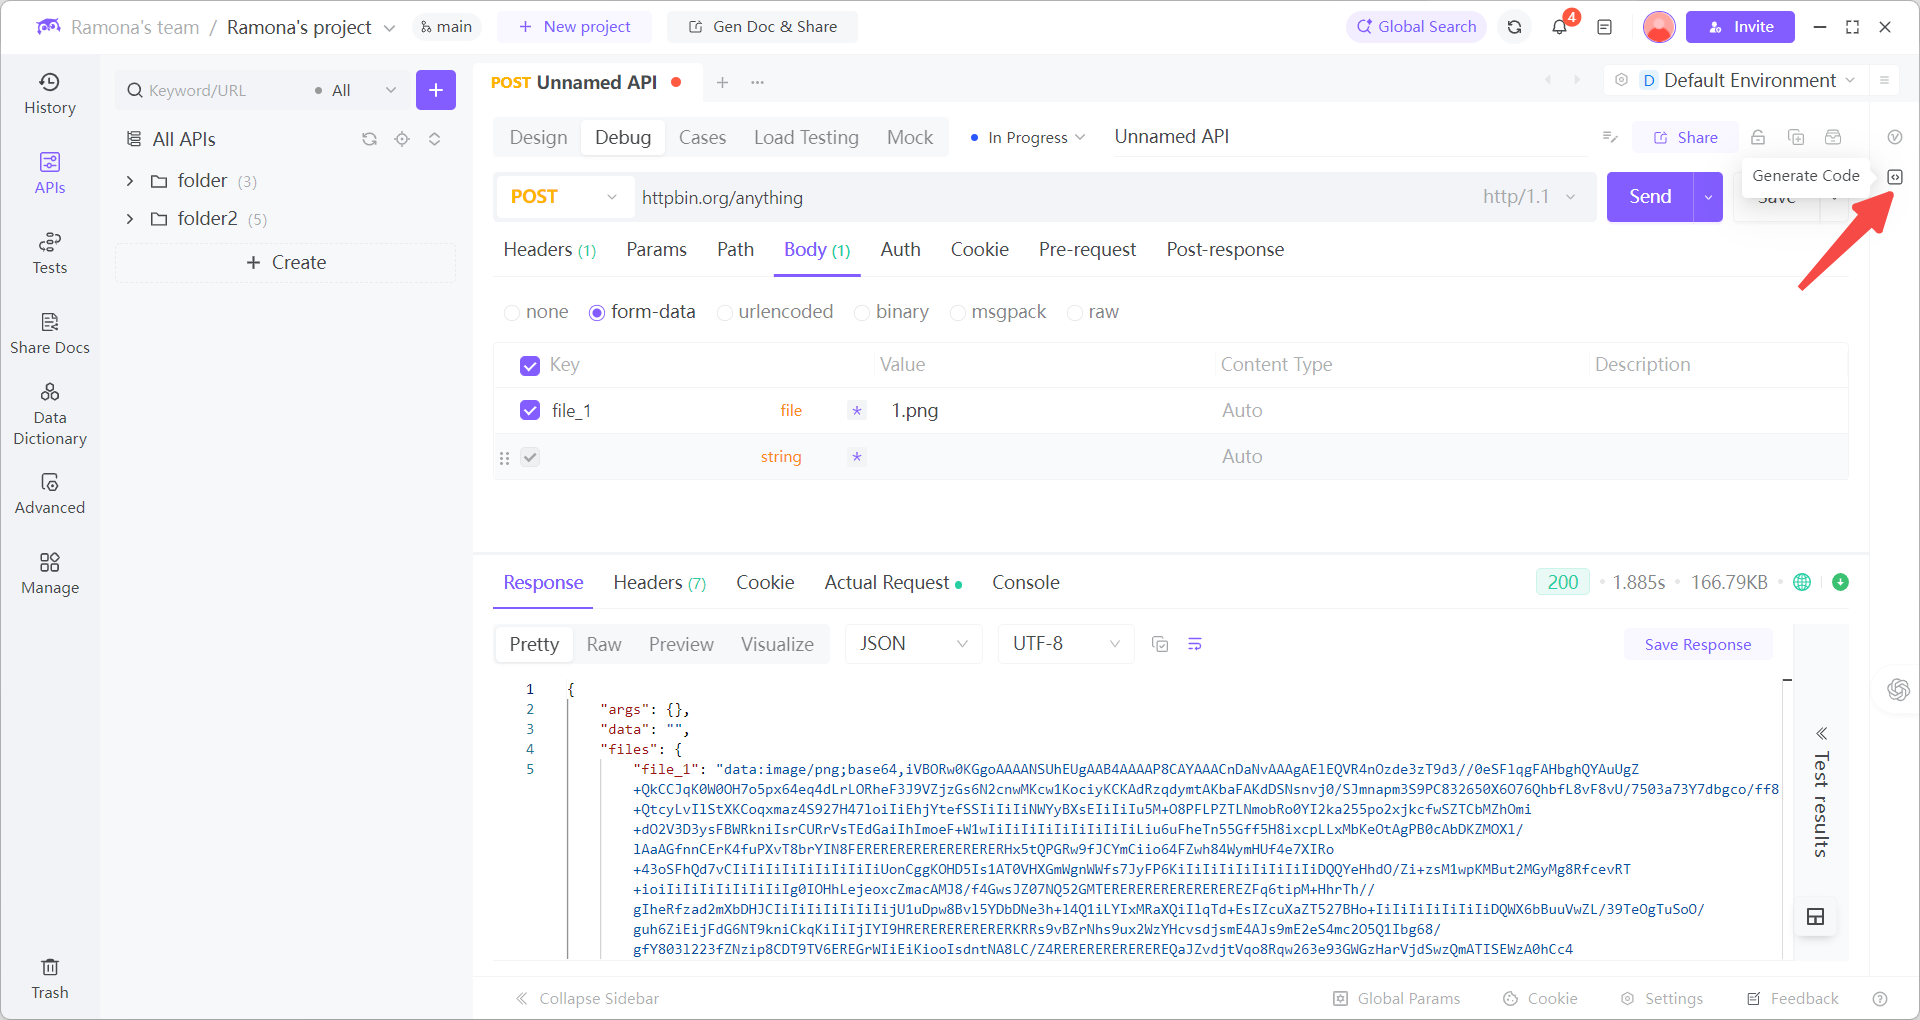
- Copy the generated code and use it directly
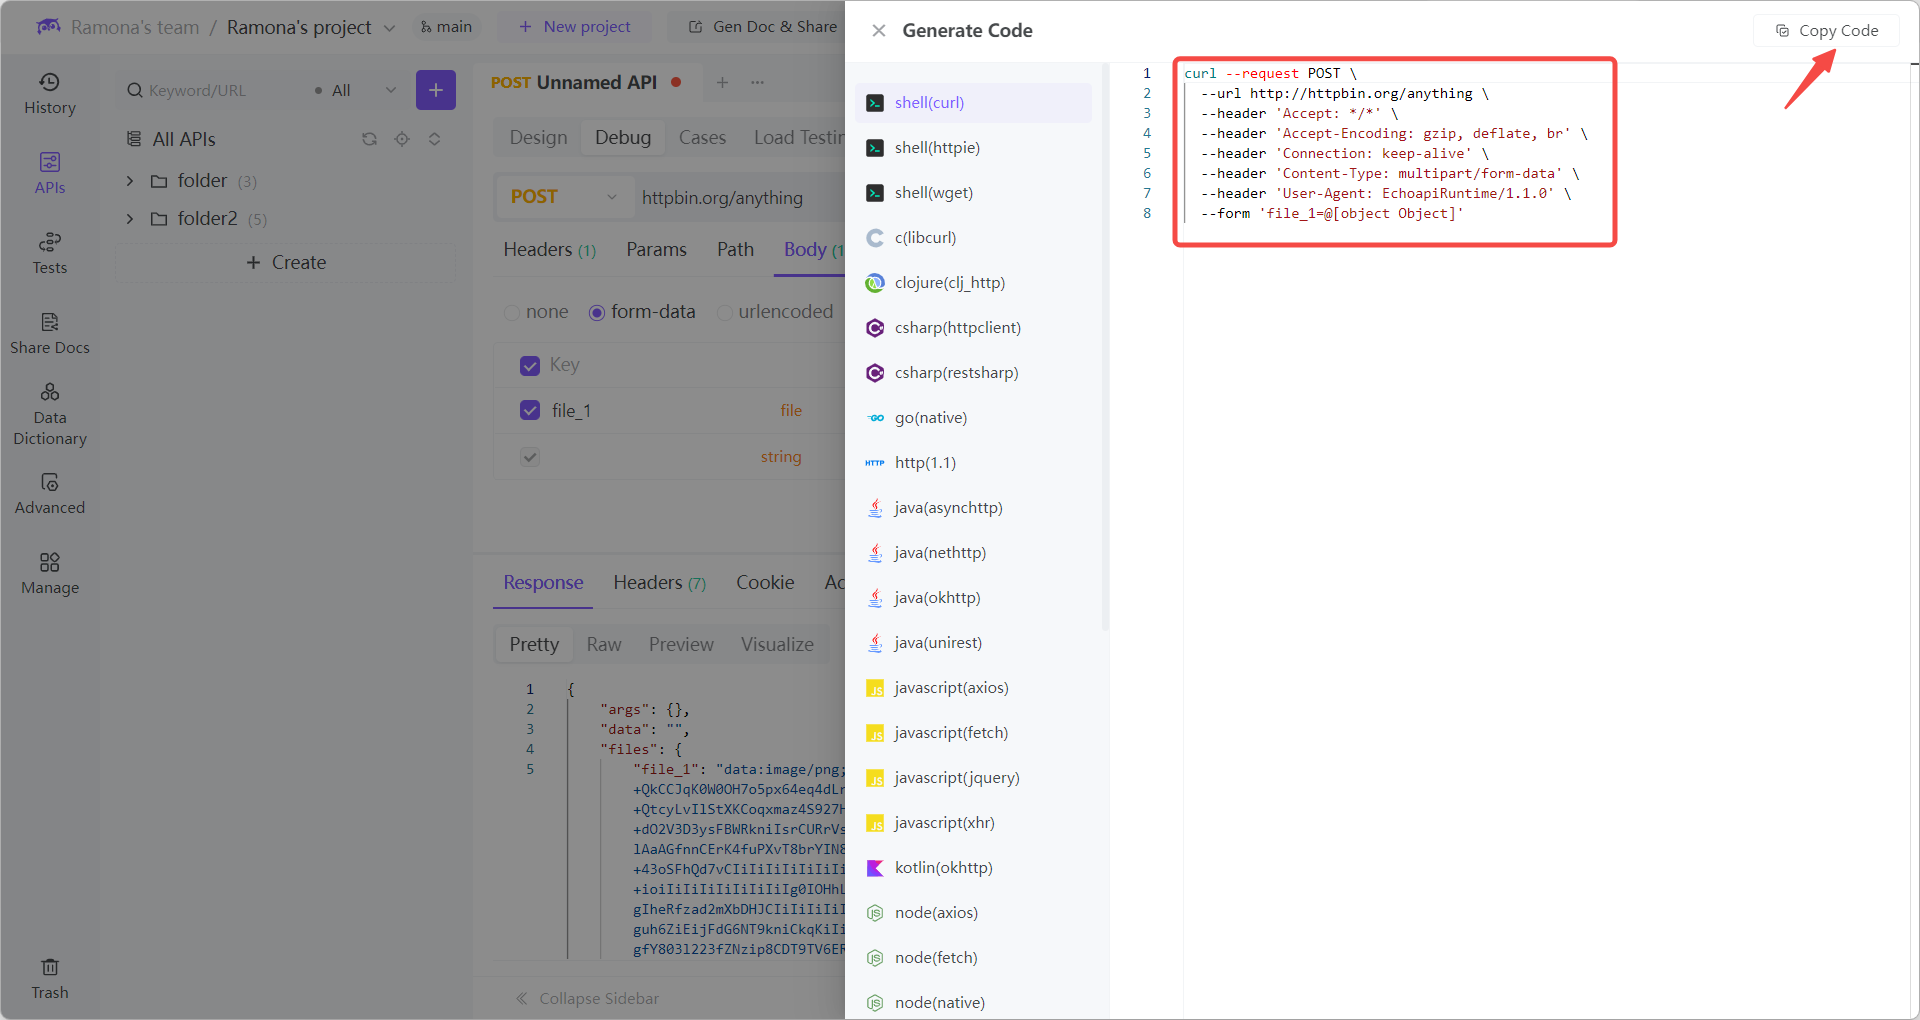
Example cURL:
curl --request POST \
  --url http://httpbin.org/anything \
  --header 'Accept: */*' \
  --header 'Authorization: Bearer <your_token>' \
  --form 'file=@/path/to/my_photo.jpg'
Quick Breakdown:
-
--request POST: Sets the HTTP method -
--header: Adds headers (like authentication) -
--form: Adds a multipart form-data fieldfile=@/path/to/my_photo.jpg:fileis the parameter key,@points to a local file
Tip: You can paste a cURL request directly into EchoAPI, and it will generate the API interface automatically.
Using File Uploads in Postman
-
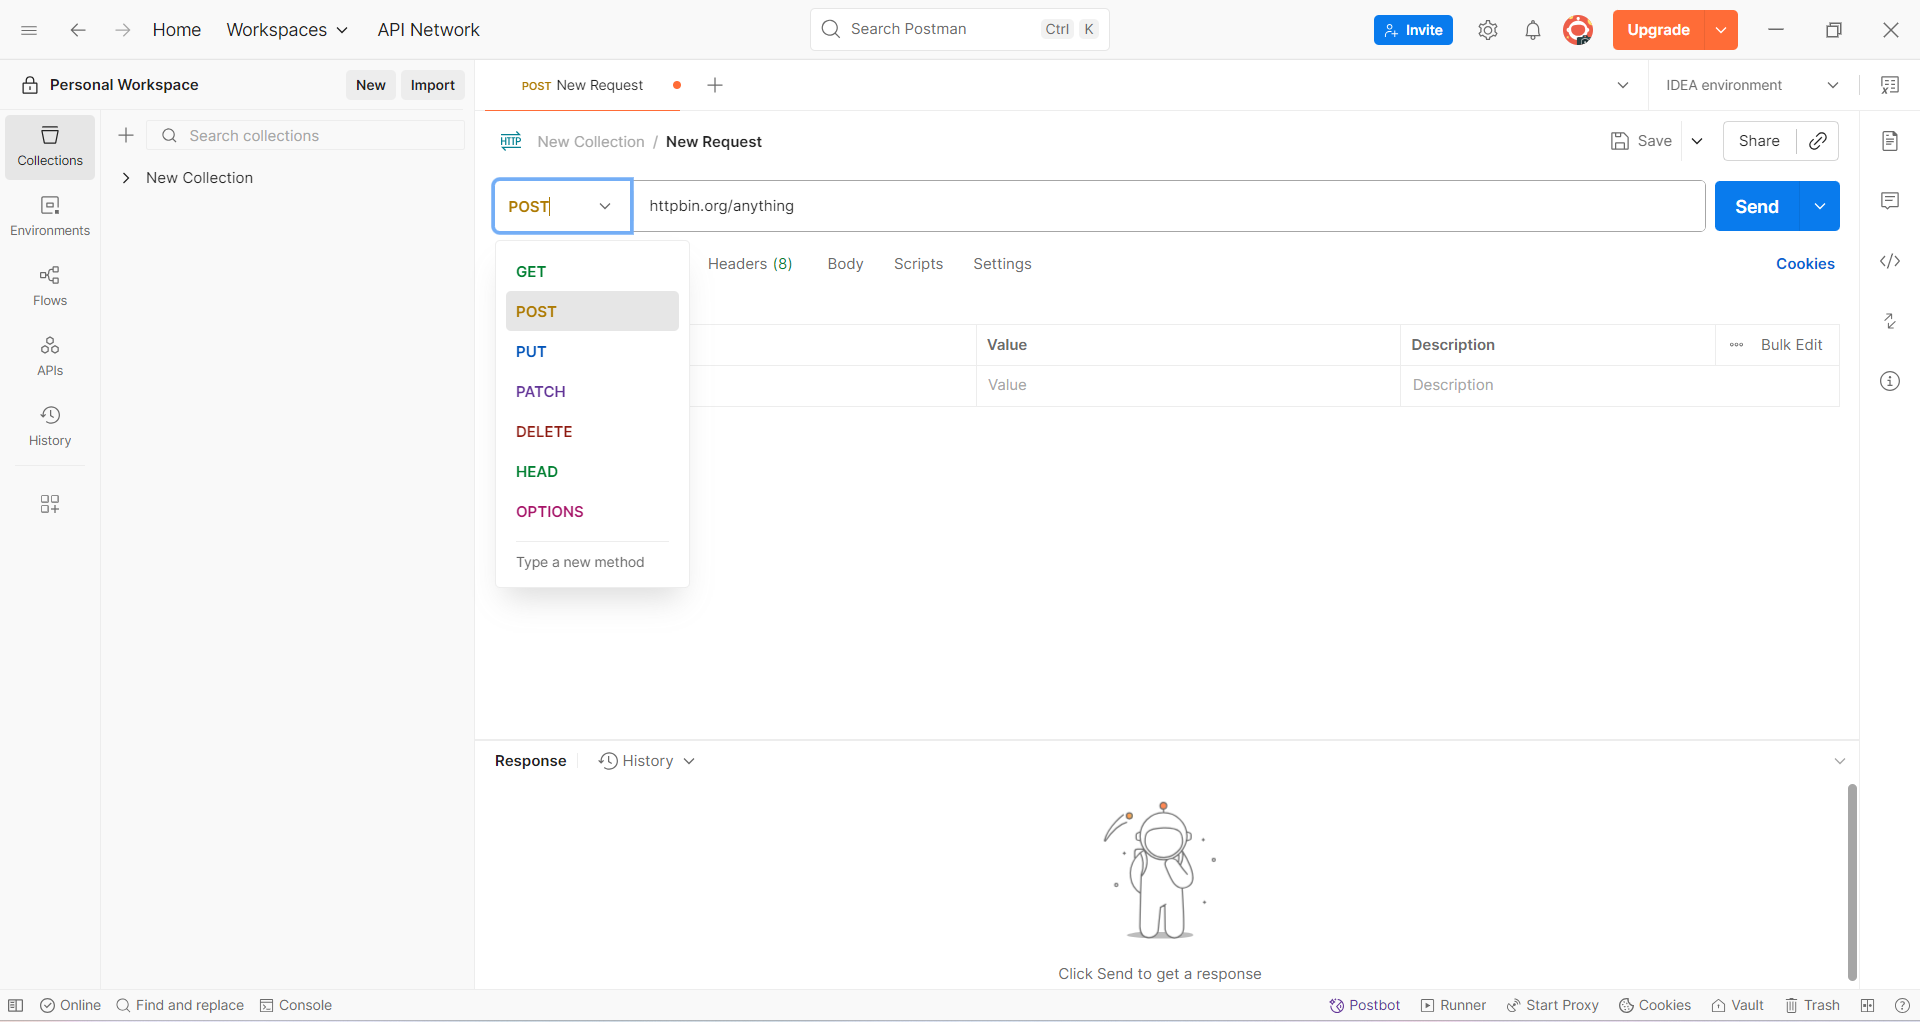
Select
POST
-
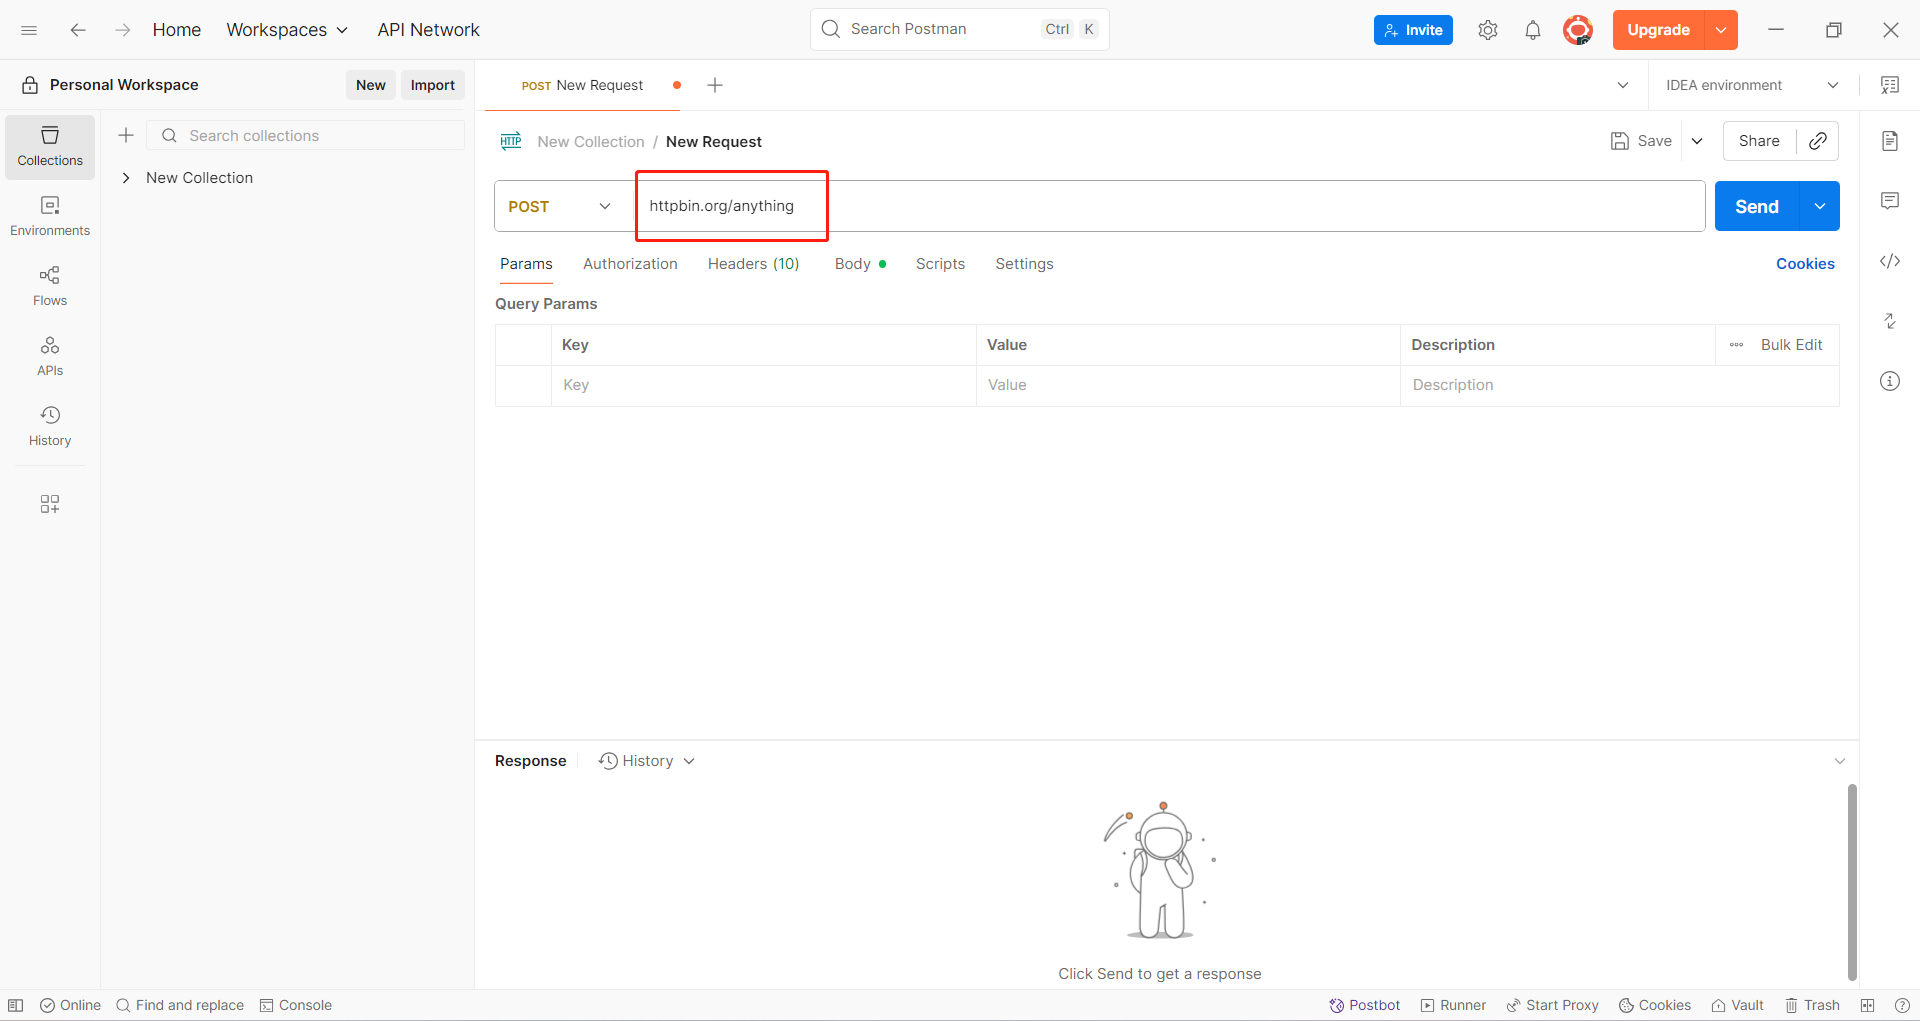
Enter the API URL
-
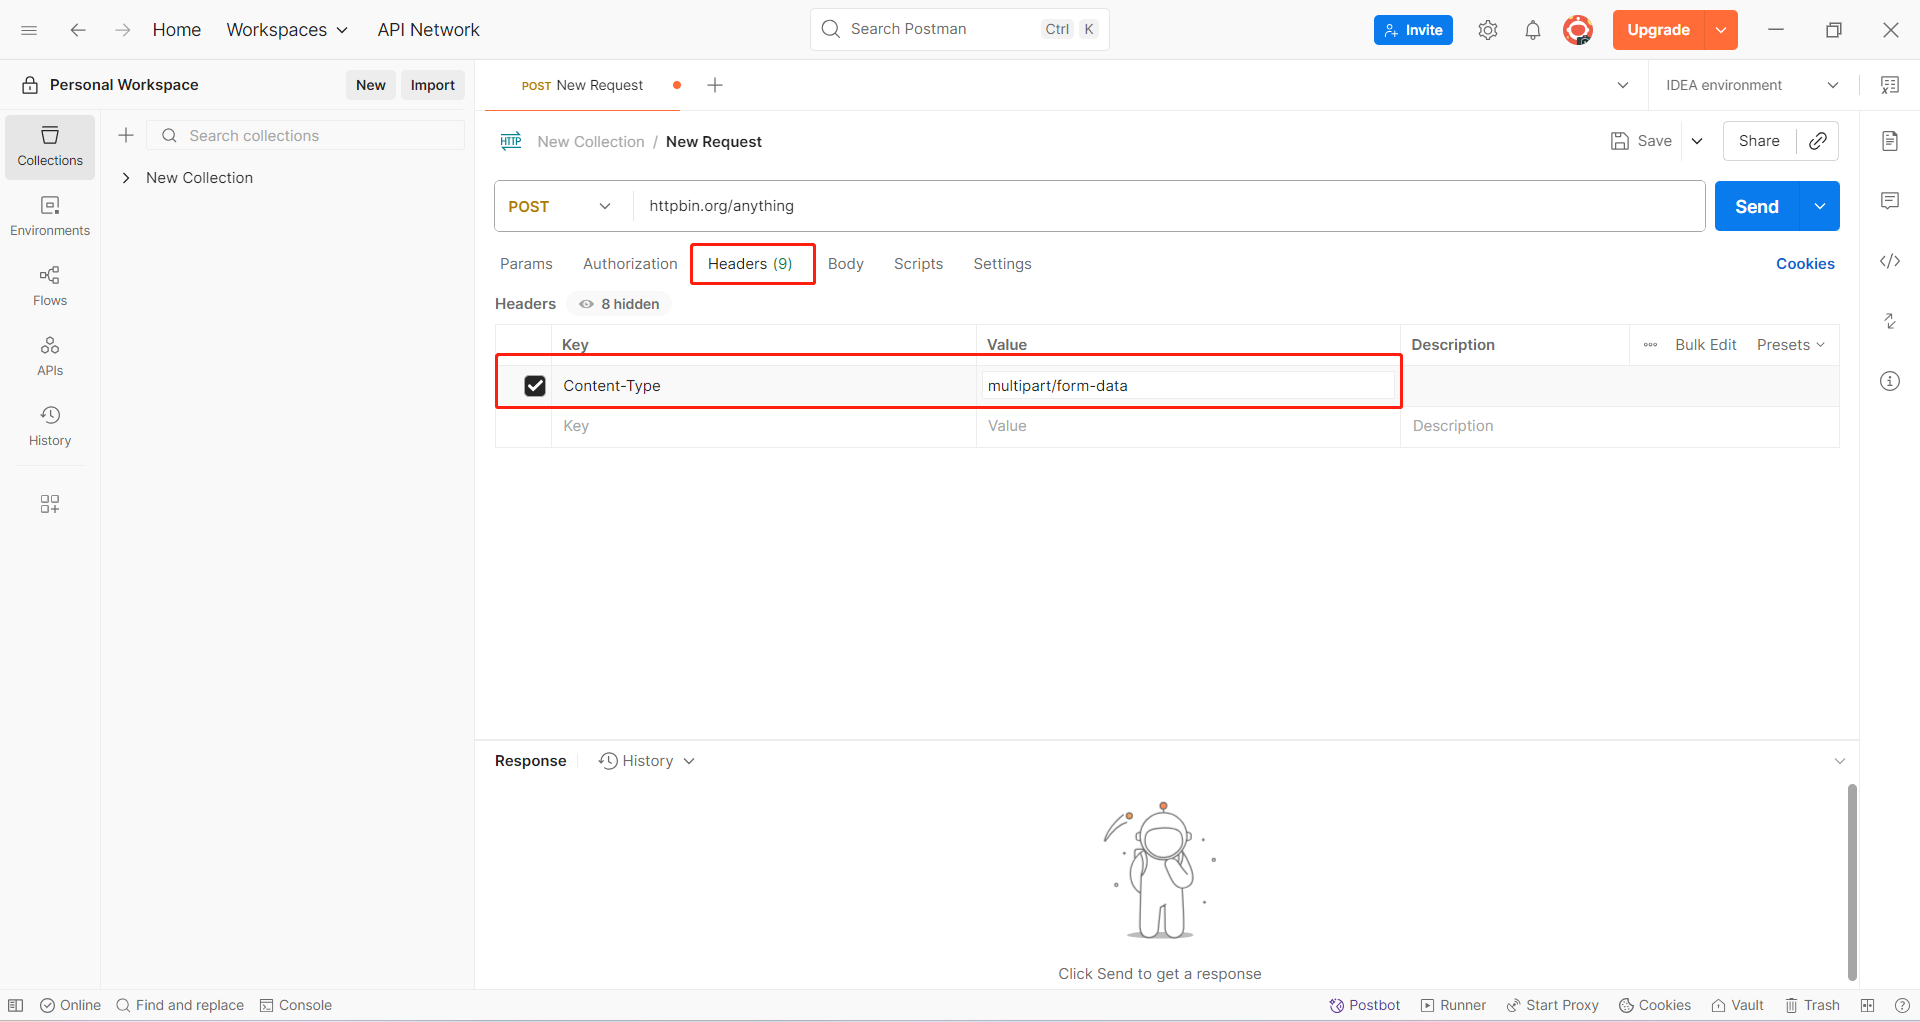
Add authentication headers if needed
-
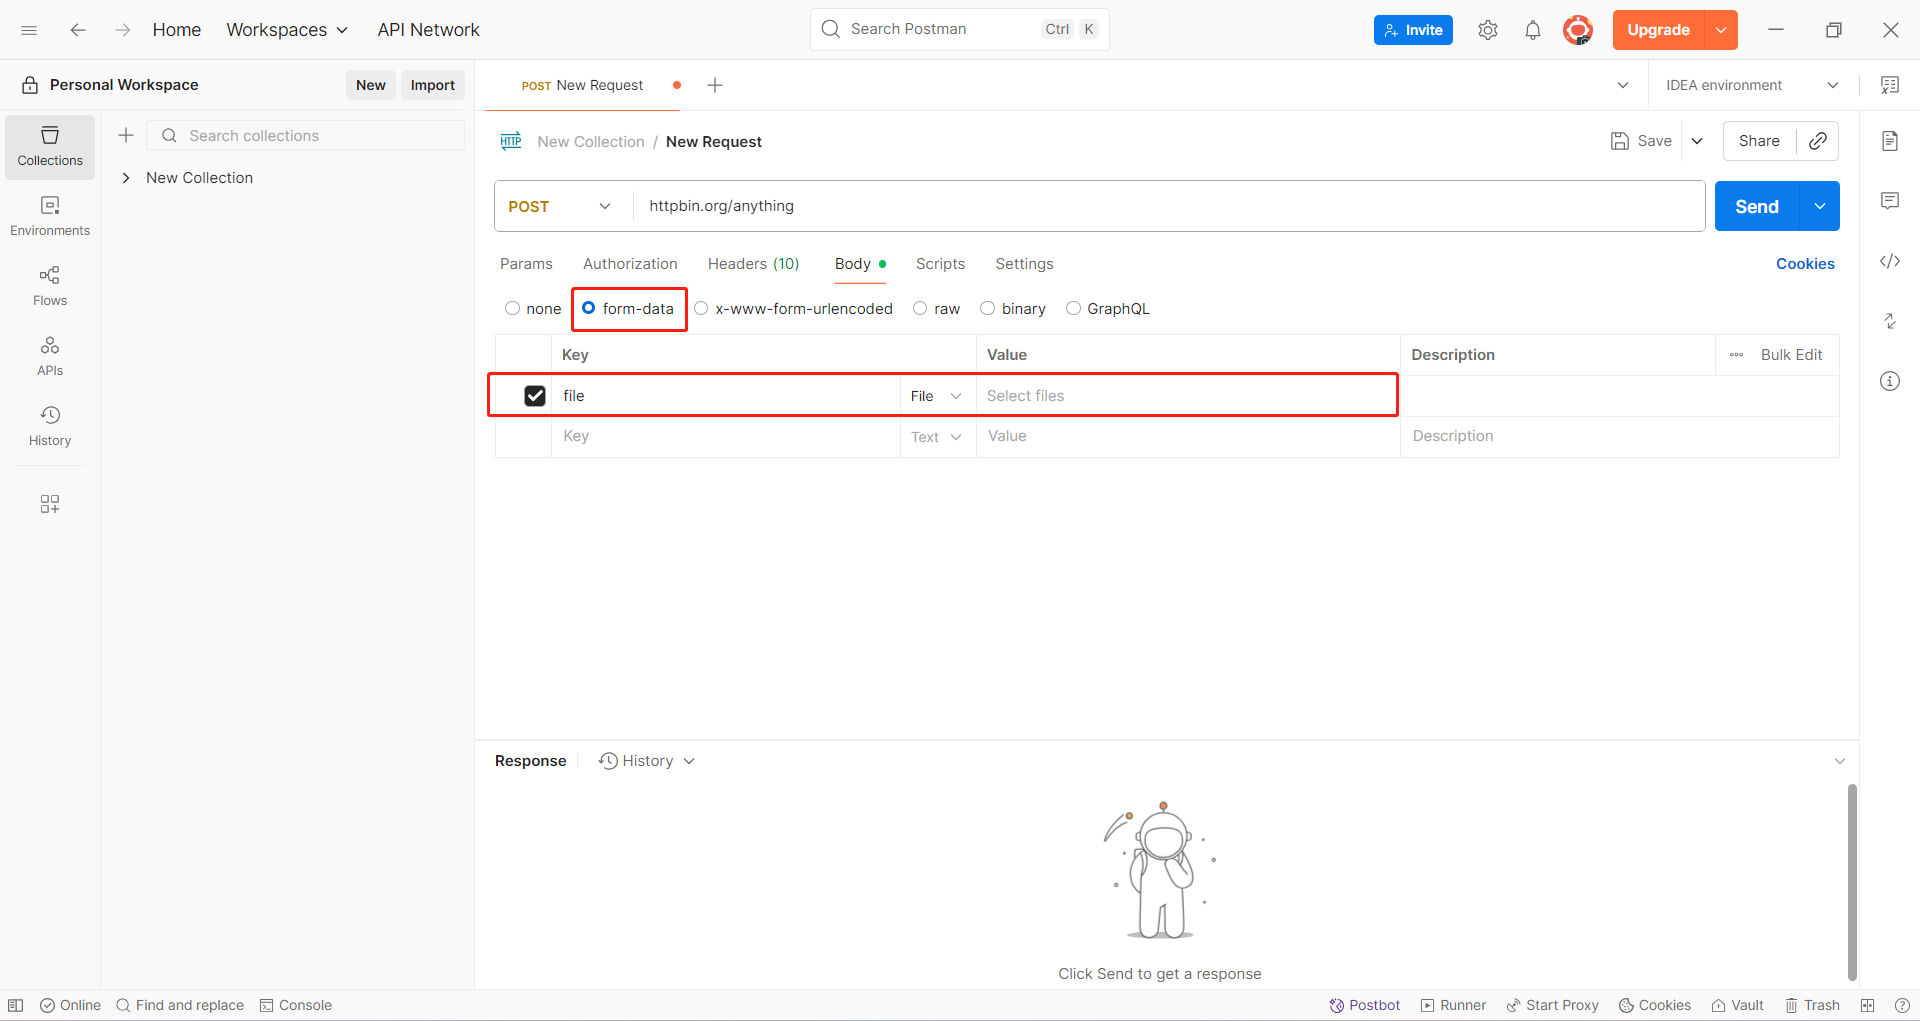
In Body, select
form-data
-
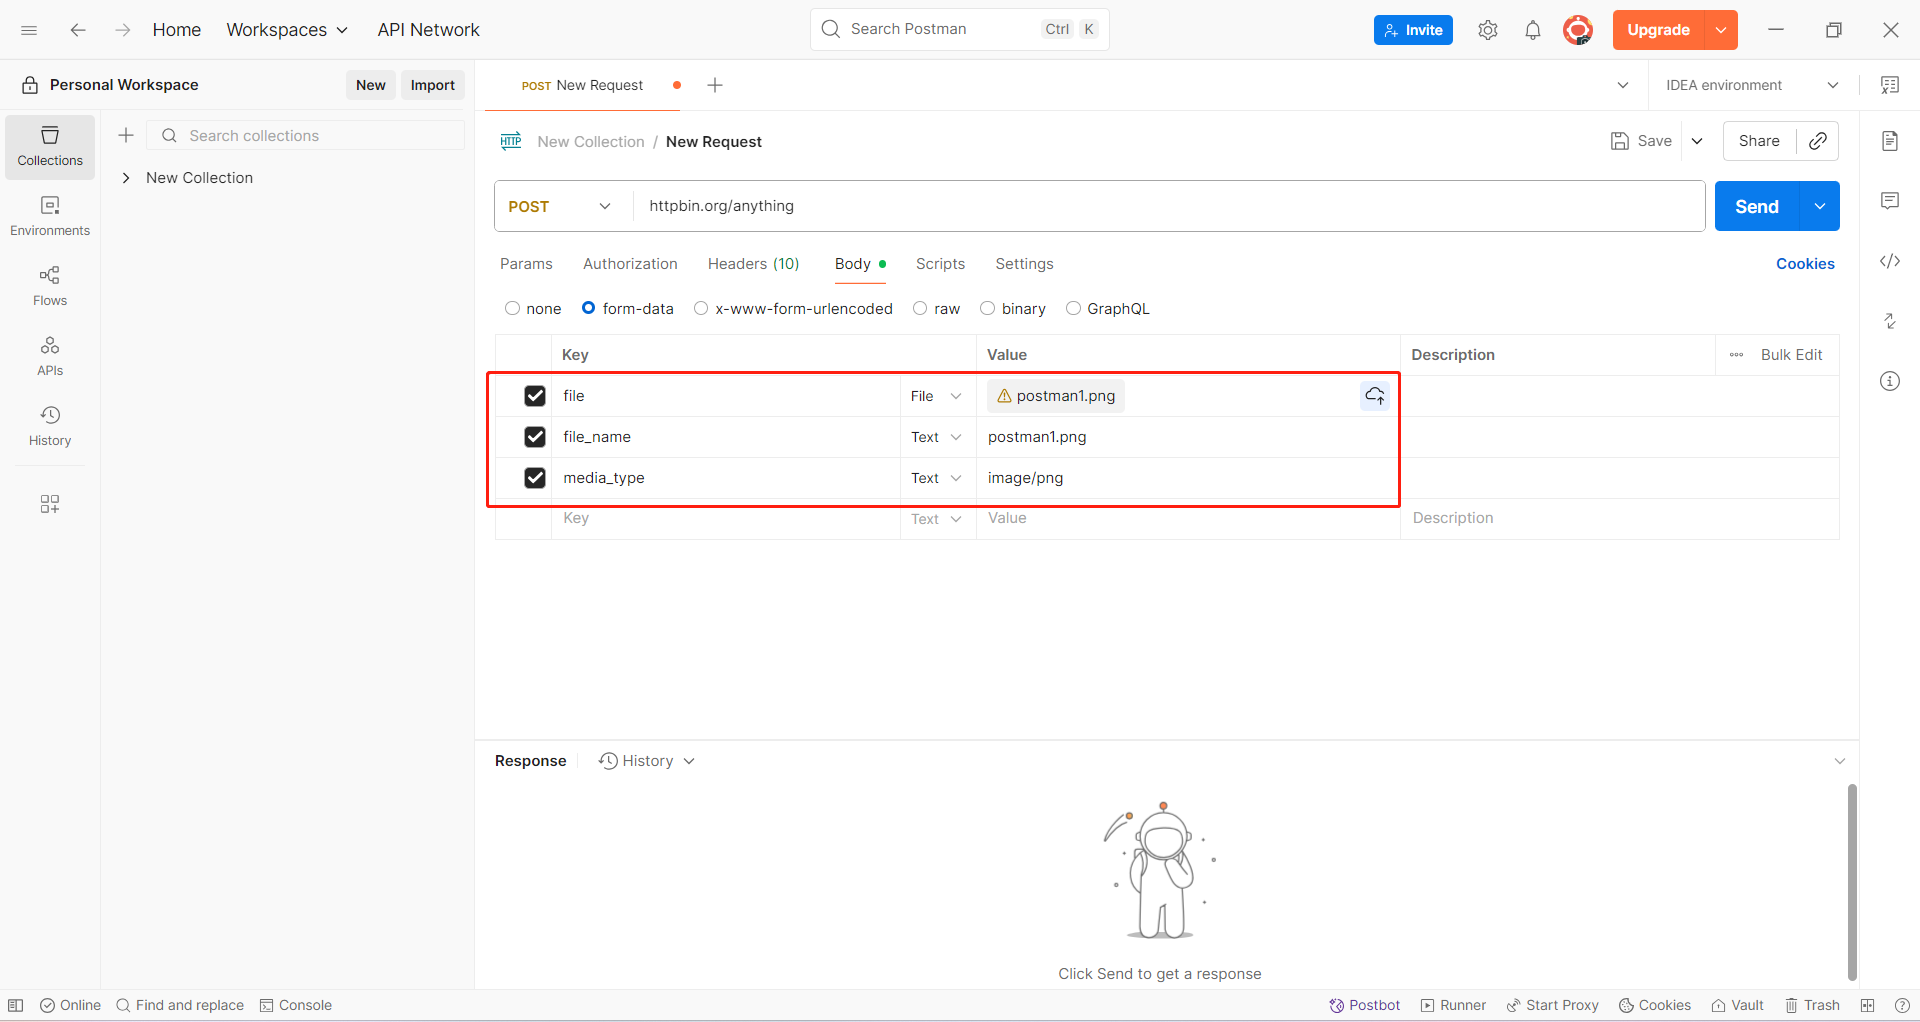
Add fields:
file→ File type, select your local filefile_name→ Text type, filenamemedia_type→ Text type, MIME type (e.g.,image/jpeg)
Troubleshooting File Uploads
If your upload fails, check these:
- API Spec – Confirm field names and required metadata.
- Content-Type – Let EchoAPI handle it automatically.
- Field Types – Use File for files, Text for strings.
- Start Simple – Test with only the file first, then add metadata.
- Check the Response – Error messages usually indicate what’s missing, e.g.,
{"error": "Missing field 'file'"}.
With EchoAPI’s form-data support, file uploads are straightforward once you get the setup right. Start small, add complexity gradually, and you’ll be uploading files like a pro in no time.
